Step by step Installation of Oracle 12c on OEL 6.3 in Virtual Box
Prerequisites and links to download required software
- Virtual box software Click Here to Download
- Oracle Linux Operating System 6.3 Click Here to Download
- Oracle 12c Database Software Click Here to Download
Note :- In case of any issues while configuration, post it in the comments below
Chapter 1 : Create and configure virtual machine
1. Double click to Open Virtual Box and click new to create new virtual machine

2. Enter the machine name, select the type as Linux and set Linux version as Oracle - 64 Bit. Next set the RAM (Memory) for 2 GB as specified below, then click on Create button

3. Now Virtual Box will prompt for location of virtual hard disk file and size of the virtual machine. We have specified the location and size set to 60 GB


5. Now you will get settings pane, on the left side bar you will find network option. Click on the Network option

6. Now select the network options and set the adapter 1 setting as specified in the screen shot below, then click on adapter 2

7. Select the network options and set the adapter 2 setting as specified in the screen shot below, then click on Shared Folders

8. Click on the add folder symbol to the top right corner

9. Click on the browse the path which you want to make Shared folder in your local system for the VM, check read-only and auto-mount options. Then click OK

10. Again click on OK, now we are done with VM creation for installing Linux OS. Next chapter we will start installing Linux on Virtual Machine

Chapter 2 : Installing Linux on Virtual Machine
11. We will start the OEL installation in the virtual machine created. Please download the OEL software from the link mentioned in the prerequisites section. Now click on button to start the Virtual Machine
 12. Once virtual machine starts there will be a popup window to select the Linux installation media. Here you can select the media ISO file having Linux installation or if you have the CD/DVD, please specify the DVD drive. We are selecting the Linux installation ISO to start OS installation

13. We shall specify the ISO path

14. Now Click on Start button to begin installation

15. Select the first option and press Enter

15. This step checks to installation media if its Select skip option
13. We shall specify the ISO path
14. Now Click on Start button to begin installation
15. Select the first option and press Enter
15. This step checks to installation media if its Select skip option

16. Click on next button to proceed

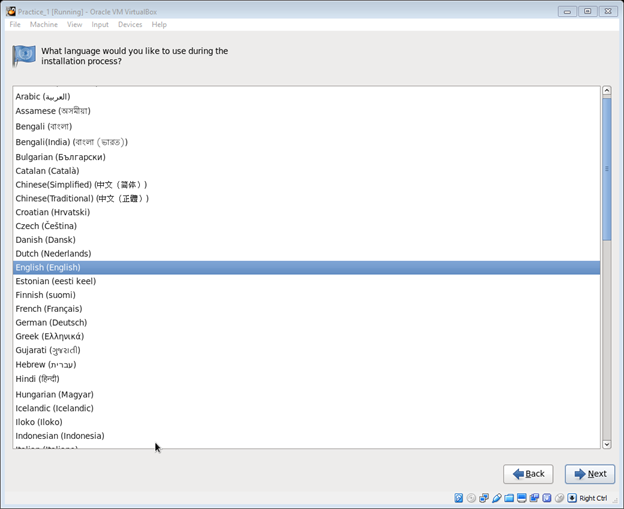
17. Select the regional language and click Next
18. Select keyboard as US English and click Next

19. Select checkbox basic storage device and click Next

20. Click on Yes, discard any data option and again click Next

21. Now provide the hostname for the virtual machine as specified below or you can choose hostname of your wish, but we have set pract1.localdomain as the hostname. After hostname is specified we have to configure the network, so click in the Configure Network button


23. Now check on connect automatically, specify the IP Address, netmask and gateway information as mentioned below and click on Apply button

24. Next edit eth1, check the Connect Automatically option, leave all the other option default and click Apply

25. Here we are completed with network configuration, Now click on Next

26. Select the timezone and Click Next to proceed

27. Provide the root password, if password is weak wizard popup alert, click on Use Anyway and click on next button

28, Select the appropriate option for partitioning, we are creating custom partitions as per our own requirement. Check Create Custom Layout and click Next

29. Now double click on Free to get Add Partition wizard. We add partition for / mount point with 12 GB or 12000 MB. Please provide information as specified below and click OK

30. Again double click on Free to add swap space of about 4 GB and click on OK

31. Again double click on Free to add another mount point /u01 , check maximum allowable size and click on OK

32. Now we have partitioned the disk, click on Next

33. Click on Format button

34. Click on Write changes to disk button and later click on Next

35. After formatting click on Next

36. Keep the default settings and click Next to proceed further

37. Select Database Server option, check the option Customize now as shown in screen and click Next

38. Click on Base systems and select Compatibility Libraries


40. Select Applications and select Internet Browser components

41. Select Development then check Development tools, Additional Development

42. Click on Next

43. Now Installation of Linux begins

46. After installation of Oracle is complete, Click on the Reboot

47. After reboot, click on Forward

48. Now accept the licence agreement and click on forward

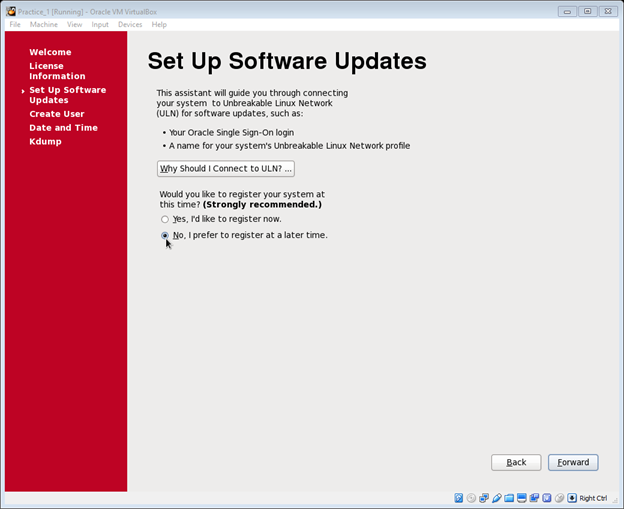
49. Here we will choose to register later, so select No option and click forward
50. Click on No Thanks, button to proceed further

51. Click on Forward

52. We can create users later so keep all the fields blank and click on Next

53. Click on Forward

54. Click on Finish. With this step we complete Linux Installation

55. Now click on other

56. Enter the Username as root

57. Enter the password and click on Login

58. Now you have logged in. In the next chapter we will prepare the system for Oracle Database software installation

Chapter 3 : Prepare the system for Oracle Database Software Installation
59. Install guest additions CD image. To do that we will mount the image first

60. Double click on the VBOXADDITIONS image, then click on Run

61. Now Click OK button


63. Now we will create the required groups and users for oracle installation

64. Create required directories for Oracle Installation and copy the software from the shared disks.

65. We will install pre-requisite RPM's required for Oracle installation as below command
# yum install oracle-rdbms-server-12cR1-preinstall
Now linux will check for the rpm in the repository and will prompt for user action if rpms can be downloaded
then press y and press Enter
66. We have to disable the firewall. Click on System > Administration > Firewall

67. Now click on OK and press disable option

68. Click on Yes and proceed

69. Edit /etc/selinux/config, here change the parameter SELINUX=disabled
#vi /etc/selinux/config
i
To edit file press i, after the parameter edited press escape then type as mentioned below w for save and q for quit
:wq

70. Now set the hostname, to do that edit /etc/hosts file as mentioned below
#vi /etc/hosts
enter
192.168.25.11 pract1.localdomain pract1
To edit file press i, after the parameter edited press escape then type as mentioned below w for save and q for quit
:wq

71. Change the owner of the mount point where Oracle has to be installed then restart the machine
#chown oracle:oinstall -R /u01
#init 6
enter
Chapter 4 : Oracle Installation
72. After restart login as oracle user

73. Now unzip the Oracle Software Installation Setup files using below command. After unzip log on to database directory and run the installer to install Oracle Database Software

76. Click on Yes and proceed

77. Select "Install database software only" option and click next

78. Select "Single instance database installation" option and Click Next

79. Click on Next

80. With Default setting Click Next

81. Specify ORACLE_BASE and ORACLE_HOME location and Click Next

82. Specify Oracle Inventory Location and oraInventory group as specified in the screen shot, then Click on Next

83. Select the OS group for the corresponding roles to provide particular sys privileges. In our can we specify dba and oper. Refer screen shot and Click Next

84. Now Click on Install button to start installation process

Installation proceeds .......

85. Interface popup the window to run couple of scripts. orainstRoot.sh and root.sh, both the scripts needs to be run as root user

86. Now go to another terminal, switch user to root, then run the scripts
$ su - root
Password:
# /u01/app/oraInventory/orainstRoot.sh
Changing permissions of /u01/app/oraInventory.
Adding read,write permissions for group.
Removing read,write,execute permissions for world.
Changing groupname of /u01/app/oraInventory to oinstall.
The execution of the script is complete.
# /u01/app/oracle/product/12.1.0/dbhome_1/root.sh
Performing root user operation.
The following environment variables are set as:
ORACLE_OWNER= oracle
ORACLE_HOME= /u01/app/oracle/product/12.1.0/dbhome_1
Enter the full pathname of the local bin directory: [/usr/local/bin]:
Copying dbhome to /usr/local/bin ...
Copying oraenv to /usr/local/bin ...
Copying coraenv to /usr/local/bin ...
Creating /etc/oratab file...
Entries will be added to the /etc/oratab file as needed by
Database Configuration Assistant when a database is created
Finished running generic part of root script.
Now product-specific root actions will be performed.
87. Click on Close button. This completes Oracle 12c database software installation

89. Run dbca, on the GUI click on Next

90. Select Create a database with default configuration, specify the required details as mentioned in the screen below and Click Next

91. Click on Finish button and Database creation starts

Database creation proceeds

92. After database creation is complete click on Close button

93. Set the ORACLE_HOME as mentioned below
$ . oraenv
ORACLE_SID = [oracle] ? CDBPROD
The Oracle base has been set to /u01/app/oracle
94. Login to the database and check the status
$ sqlplus / as sysdba
SQL*Plus: Release 12.1.0.2.0 Production on Wed Aug 31 23:26:10 2016
Copyright (c) 1982, 2014, Oracle. All rights reserved.
Connected to:
Oracle Database 12c Enterprise Edition Release 12.1.0.2.0 - 64bit Production
With the Partitioning, OLAP, Advanced Analytics and Real Application Testing options
SQL> select instance_name, status, con_id from v$instance;
INSTANCE_NAME STATUS CON_ID
---------------- ------------ ----------
CDBPROD OPEN 0
95. Verify the Pluggable database
SQL> select name, open_mode from v$pdbs;
NAME OPEN_MODE
------------------------------ ----------
PDB$SEED READ ONLY
PDB_SALES READ WRITE
$ unzip linuxamd64_12102_database_1of2.zip
$ unzip linuxamd64_12102_database_2of2.zip
After unzip is complete, go to database directory from where we will start Oracle Database software installation
74. Now begin installation of database software
$ ./runInstaller
75. Uncheck the Checkbox " In wish to receive security updates...." and click on Next
76. Click on Yes and proceed
77. Select "Install database software only" option and click next
78. Select "Single instance database installation" option and Click Next
79. Click on Next
80. With Default setting Click Next
81. Specify ORACLE_BASE and ORACLE_HOME location and Click Next
82. Specify Oracle Inventory Location and oraInventory group as specified in the screen shot, then Click on Next
83. Select the OS group for the corresponding roles to provide particular sys privileges. In our can we specify dba and oper. Refer screen shot and Click Next
84. Now Click on Install button to start installation process
Installation proceeds .......
85. Interface popup the window to run couple of scripts. orainstRoot.sh and root.sh, both the scripts needs to be run as root user
86. Now go to another terminal, switch user to root, then run the scripts
$ su - root
Password:
# /u01/app/oraInventory/orainstRoot.sh
Changing permissions of /u01/app/oraInventory.
Adding read,write permissions for group.
Removing read,write,execute permissions for world.
Changing groupname of /u01/app/oraInventory to oinstall.
The execution of the script is complete.
# /u01/app/oracle/product/12.1.0/dbhome_1/root.sh
Performing root user operation.
The following environment variables are set as:
ORACLE_OWNER= oracle
ORACLE_HOME= /u01/app/oracle/product/12.1.0/dbhome_1
Enter the full pathname of the local bin directory: [/usr/local/bin]:
Copying dbhome to /usr/local/bin ...
Copying oraenv to /usr/local/bin ...
Copying coraenv to /usr/local/bin ...
Creating /etc/oratab file...
Entries will be added to the /etc/oratab file as needed by
Database Configuration Assistant when a database is created
Finished running generic part of root script.
Now product-specific root actions will be performed.
87. Click on Close button. This completes Oracle 12c database software installation
Chapter 5: Post Installation Step
88. Set profile with ORACLE_HOME location and PATH
$ vi .bash_profile
export ORACLE_HOME=/u01/app/oracle/product/12.1.0/dbhome_1
export PATH=/u01/app/oracle/product/12.1.0/dbhome_1/bin:$PATH
press esc button
:wq
[oracle@pract1 ~]$ . .bash_profile
89. Run dbca, on the GUI click on Next
$ dbca
Select "Create Database" option and click Next
90. Select Create a database with default configuration, specify the required details as mentioned in the screen below and Click Next
91. Click on Finish button and Database creation starts
Database creation proceeds
92. After database creation is complete click on Close button
93. Set the ORACLE_HOME as mentioned below
$ . oraenv
ORACLE_SID = [oracle] ? CDBPROD
The Oracle base has been set to /u01/app/oracle
94. Login to the database and check the status
$ sqlplus / as sysdba
SQL*Plus: Release 12.1.0.2.0 Production on Wed Aug 31 23:26:10 2016
Copyright (c) 1982, 2014, Oracle. All rights reserved.
Connected to:
Oracle Database 12c Enterprise Edition Release 12.1.0.2.0 - 64bit Production
With the Partitioning, OLAP, Advanced Analytics and Real Application Testing options
SQL> select instance_name, status, con_id from v$instance;
INSTANCE_NAME STATUS CON_ID
---------------- ------------ ----------
CDBPROD OPEN 0
95. Verify the Pluggable database
SQL> select name, open_mode from v$pdbs;
NAME OPEN_MODE
------------------------------ ----------
PDB$SEED READ ONLY
PDB_SALES READ WRITE
Thank you so much!!!
ReplyDeleteThank you!
ReplyDeleteThank you for this tutorial, I could have an instance for my study on oracle database with no issues. :)
ReplyDelete